RasPiO® Breakout
RasPiO® Breakout allows you to connect pretty much any kind of wire to any GPIO pin on the Raspberry Pi®‘s main header.
Less Chance of Wiring Errors
RasPiO® Breakout reduces the chances of wiring errors because you can clearly see which pin corresponds to which port. You don’t need to consult a pinout chart or count “X pins up from the bottom-right pin”. This means your circuits are more likely to work first time and you’re less likely to damage your Pi or attached electronics.
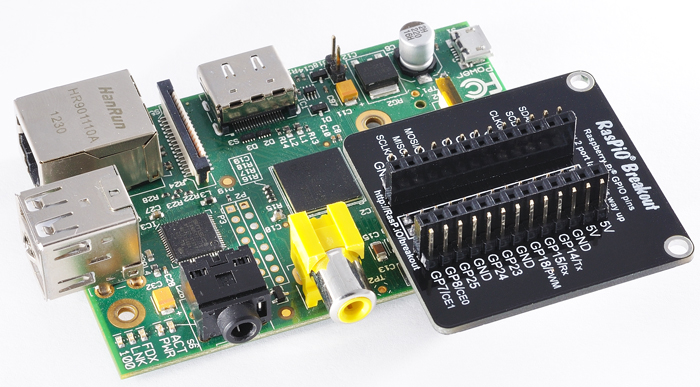
RasPiO® Breakout on the Raspberry Pi
Repurpose Your Pi Without Destroying Your Project
If, like me, you work on lots of projects at once, you can soon find you run out of Raspberry Pis. You can either buy more Pis, or undo the wiring from one of your projects. I find this a real nuisance and time waster. With RasPiO® Breakout, the wiring goes to the RasPiO® Breakout board and not the Pi. You can disconnect the Pi, leaving all the wiring intact, and repurpose your Pi at a moment’s notice without messing up your project. This will save you a load of time and aggravation.
Compatible with Rev 1 and Rev 2 Pi
You can assemble RasPiO® Breakout either way up depending on whether you want to use it with Rev 1 or Rev 2 Pi.
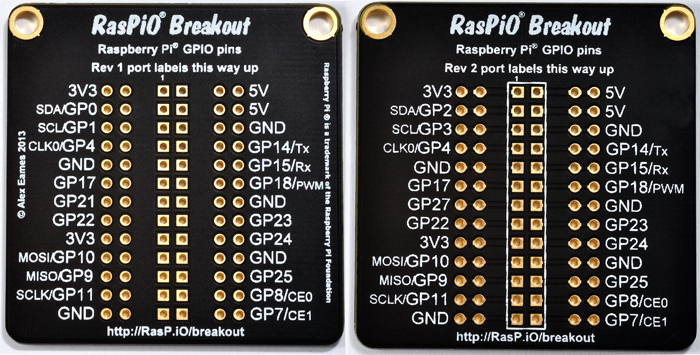
RasPiO® Breakout board, both sides
Large, Clear Labels
I’m 44, and although I can still read the small writing on most PCBs, it’s easier and much more comfortable when the fonts are a little larger. So I’ve designed the board that I wanted to use. If the labels are unmistakably clear, you’re much less likely to make a wiring error too.
Alt Functions Too
RasPiO® Breakout shows both GPIO numbers and alternative functions of the P1 header pins. The board needed to be a little bigger to fit the extra labels on, but I think it’s worth it. It’s good to have all the information in front of you when choosing which ports to use.
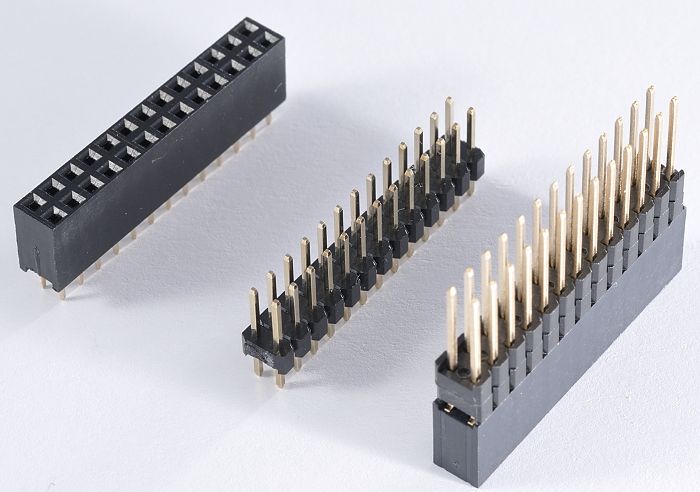
Attach Any Header You Like
If you put a row of pins on the outside and a row of sockets on the inside, like this, it’s very versatile…
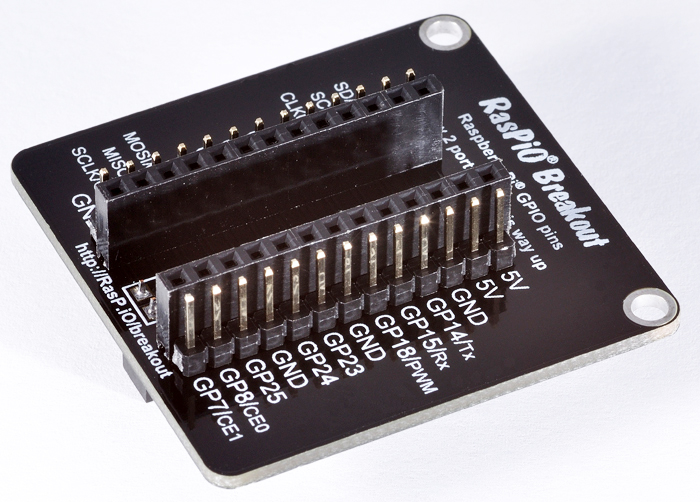
RasPiO® Breakout showing a row of male and female pin headers on each side
This means you can use jumper wires with either male or female ends to make connections. You don’t need to look for a specific type of wire.
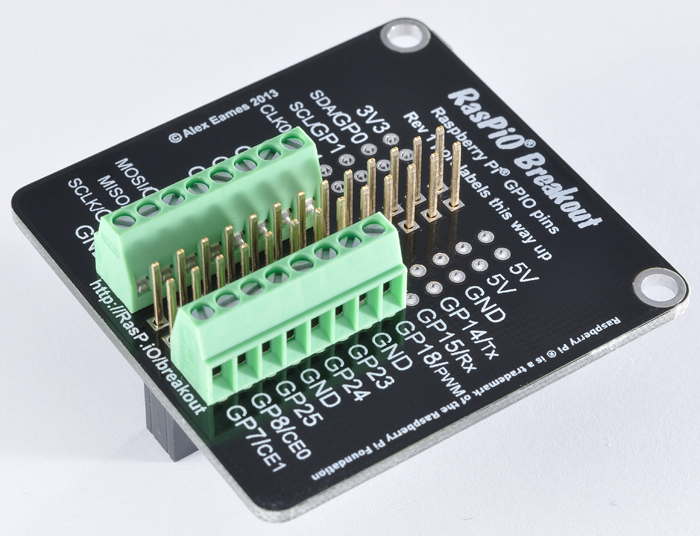
Central Connector Options
For the central connector, you can use a standard female 26-way connector, a male pin header and ribbon cable, or a stacking header that combines both options.
3 possible central headers for RasPiO® Breakout
RasPiO® Breakout is supplied with a standard female socket header. But you may choose to assemble it differently. I’ll show you some other options below.

RasPiO® Breakout in three central header configurations. Click to enlarge.
Outer Header Options
You could even add screw terminal headers if you really like them (although it covers both sets of holes)…
RasPiO® Breakout with screw terminals
…or just choose one header for now and leave a set of holes for future use.
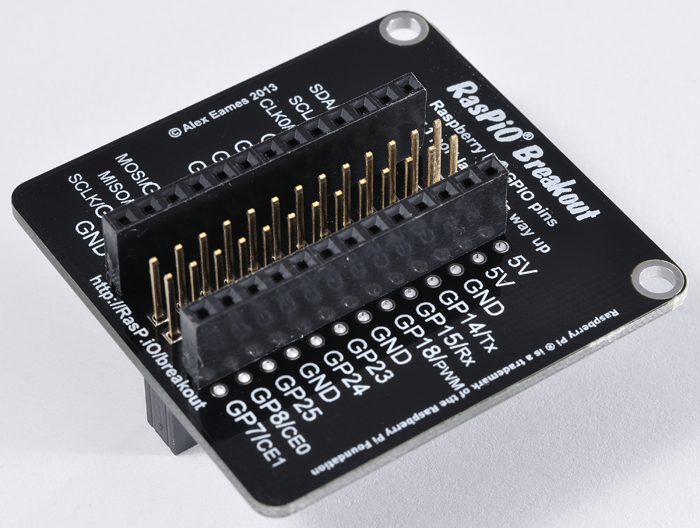
RasPiO® Breakout with one pair of outside headers
Use With PiBow or Other Cases
With a ribbon cable*, you can use RasPiO® Breakout to access the GPIO pins even with the Pi fully cased…
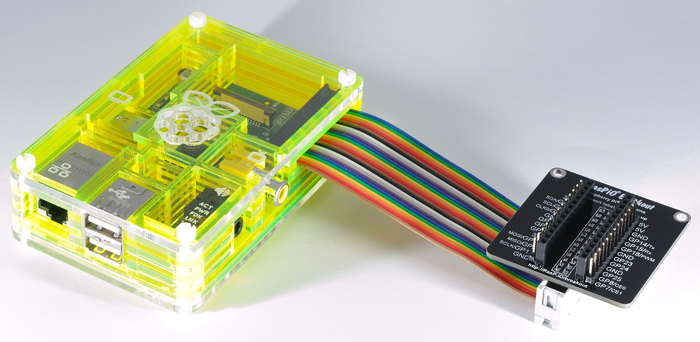
RasPiO Breakout in use with Toxic PiBow case
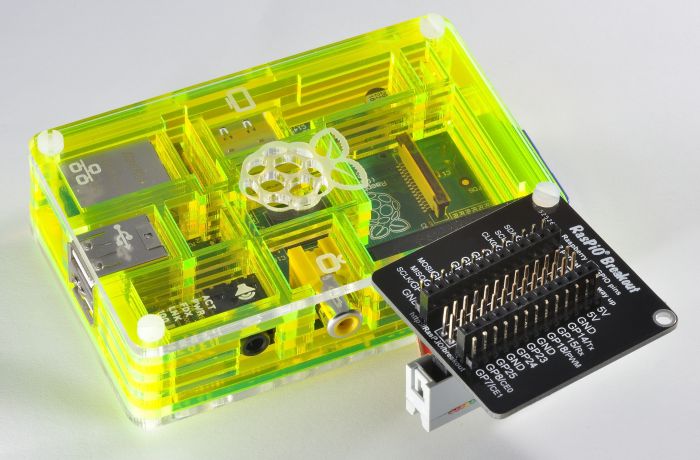
RasPiO® Breakout attached to Toxic Pibow using Pibow screw.
* for attachment underneath, the ribbon cable needs to have an IDC male connector at one end to avoid reversing the pinouts.
You Can Even Use It ‘Off-Pi’
RasPiO® Breakout also has mounting holes. So you could use it with a ribbon cable and mount it somewhere not on the Pi. I expect most people would prefer to mount it on the Pi, but you have the choice.
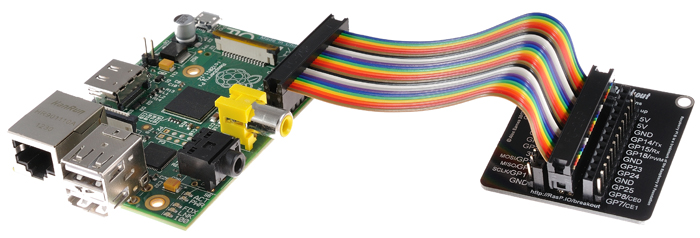
RasPiO® Breakout used “off Pi” with ribbon cable
How Much and Where Can I Buy One?
You can buy one (or more) right here for as little as £6 delivered anywhere in the world.
RasPiO® Breakout is also available from CPC.
If You Want Port Protection
RasPiO® Breakout has no onboard port protection. If that’s what you want or need, you’ll be better off with the RasPiO® Breakout Pro
If You Want Just Port Labelling
You can use the RasPiO® Breakout bare board as a port identification aid, but if you want to do that, you’ll probably be better off with the the RasPiO® Port Labels Board, which is designed with that use in mind.
RasPiO® Breakout Build Instructions
- Choose whether to assemble as Rev 1 or Rev 2. Whichever you choose, that side faces upwards
- Solder the main central 26-way female header underneath first.
- Next solder the inner (female) headers on top. (Solder one pin, then straighten it and do the rest. Using a sponge for support helps keep things in place.)
- Then solder the outer (male) headers on top.
Have a good look at your soldering and ensure you haven’t shorted any pins together. Ideally you should test all adjacent ports with a multimeter in resistance mode.
You may choose to vary how you assemble the RasPiO® Breakout according to your personal preference.
Step By Step Build Photo Sequence
RasPiO® Breakout Python Programs
Some simple Python scripts to test the GPIO ports can be found at
https://github.com/raspitv/raspio-breakout
Photos
Build instructions | Python software
Download the RasPiO® Breakout assembly instruction leaflet (printable PDF).
_______________________________________________
RasPiO® is a trademark of Alex Eames
Raspberry Pi® is a trademark of the Raspberry Pi Foundation